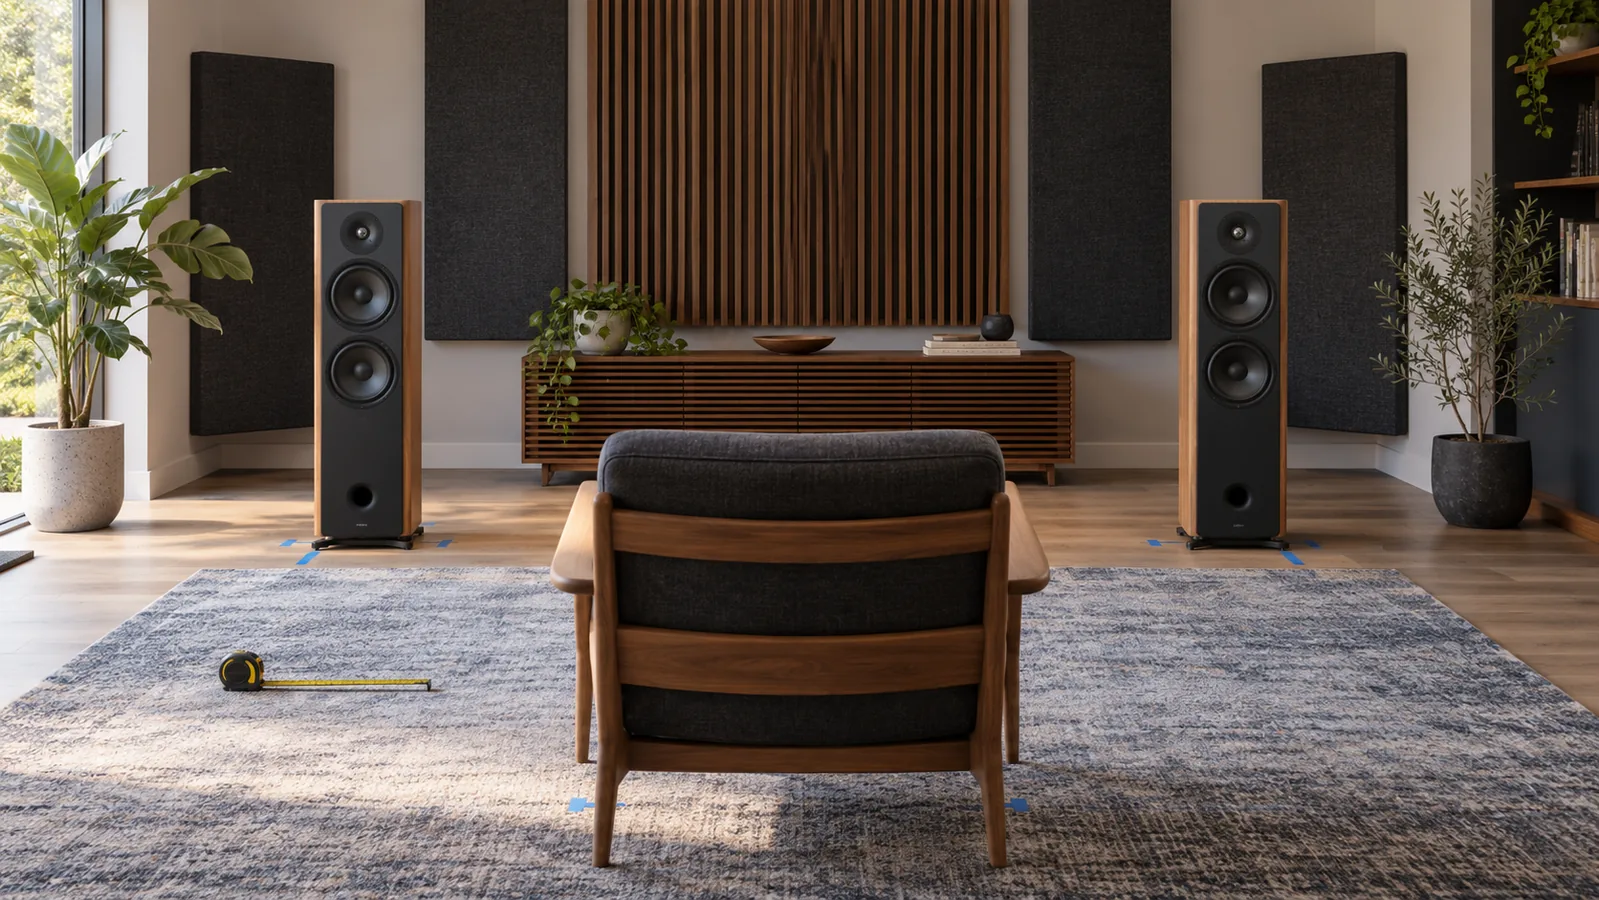
Speaker placement changes what reaches your ears before room correction, an amplifier upgrade, or acoustic treatment can do anything. Move a speaker or the listening seat and you change the direct-sound timing, the strength and delay of reflections, boundary reinforcement, and the way the system excites room modes. That is why the same pair of speakers can sound precise in one position and unfocused or bass-heavy a few feet away.
This speaker placement guide gives you a repeatable starting point, then shows how to adjust it. The stereo triangle is useful, not universal: results depend on speaker radiation, bass extension, design, room, and listening distance.
What placement changes—and what it cannot fix
Placement affects five connected outcomes:
- Imaging and center focus: Small left/right differences in distance, level, height, or reflections can pull voices away from the center or make images diffuse.
- Soundstage width and depth: Spacing, toe-in, nearby boundaries, and early reflections influence whether the stage feels narrow, continuous, or hollow in the middle.
- Bass consistency: Speaker and seat positions determine how strongly room modes and boundary cancellations are excited or heard.
- Clarity: Strong early reflections can combine with the direct sound and blur transients or change tonal balance.
- Listening balance: Height, angle, and distance change the on-axis and off-axis response that reaches the listener.
Placement cannot repair a damaged driver, severe channel mismatch, inadequate output, or long low-frequency decay by itself. It also cannot guarantee identical bass at every seat. Treat it as the first physical optimization step, followed by measurement, treatment, subwoofer integration, and electronic correction where needed.
Start with the speaker–listener geometry
For two-channel stereo, begin with the two speakers and the main listening position forming an approximately equilateral triangle. In angular terms, each speaker is about 30 degrees to the left or right of center, creating a 60-degree included angle. Neumann’s monitor guidance uses ±30 degrees for 2.0 systems, while Dolby’s home-theater layouts allow the front left and right speakers to sit roughly 22–30 degrees from center.
Those angles are starting points, not pass/fail limits. Too little spacing can narrow the stage; too much can weaken vocals and leave a “hole” in the middle. A mono voice should form a stable image halfway between the speakers, not seem to come from two cabinets.
Measure from the same reference point on each speaker—ideally the acoustic axis or front baffle near the tweeter—to the listening position. Equal physical distances make equal arrival times more likely. If furniture forces an asymmetric layout, an AV receiver or monitor controller can add delay, but physical symmetry remains preferable because delay cannot make unequal side-wall reflections identical.
Set height, listening distance, and symmetry
Place the acoustic axis near seated ear height unless the manufacturer specifies another vertical listening window. On a conventional two-way speaker this is often near the tweeter, but coaxial, waveguide, line-array, and multi-driver designs may use a different reference axis. Bookshelf speakers usually need rigid stands to reach the intended height and to keep both cabinets stable. Floorstanding speakers already establish driver height, so seat height and listening distance become the adjustable variables.
Keep the left and right speakers at the same height and give them similar surroundings. A speaker beside a bare wall and another beside an open doorway will produce different reflected energy and boundary loading even if the tape-measure distances match. Genelec’s placement guidance emphasizes equal distances to nearby boundaries and a listening position centered left-to-right because similar reflections support accurate stereo imaging.
Follow the maker’s listening-distance range when available. Too close to a multi-way speaker, its drivers may not integrate as intended; too far away in a reflective room, room sound can dominate.
Use toe-in to balance focus, width, and reflections
Toe-in rotates each speaker toward the listening area. More toe-in usually increases the proportion of on-axis sound and may reduce energy aimed at the side walls. That can sharpen the center image, but it may also make the top end brighter or narrow the listening area. Less toe-in can widen the apparent stage and the usable seating area, but may increase side-wall energy or weaken focus.
There is no universal toe-in angle because horizontal dispersion differs. Compare straight ahead, axes crossing behind your head, and axes aimed at the main seat, using the same short tracks and level. Stop when the center is stable, the stage continuous, and treble comfortable. Follow the manufacturer’s specified listening axis if provided.
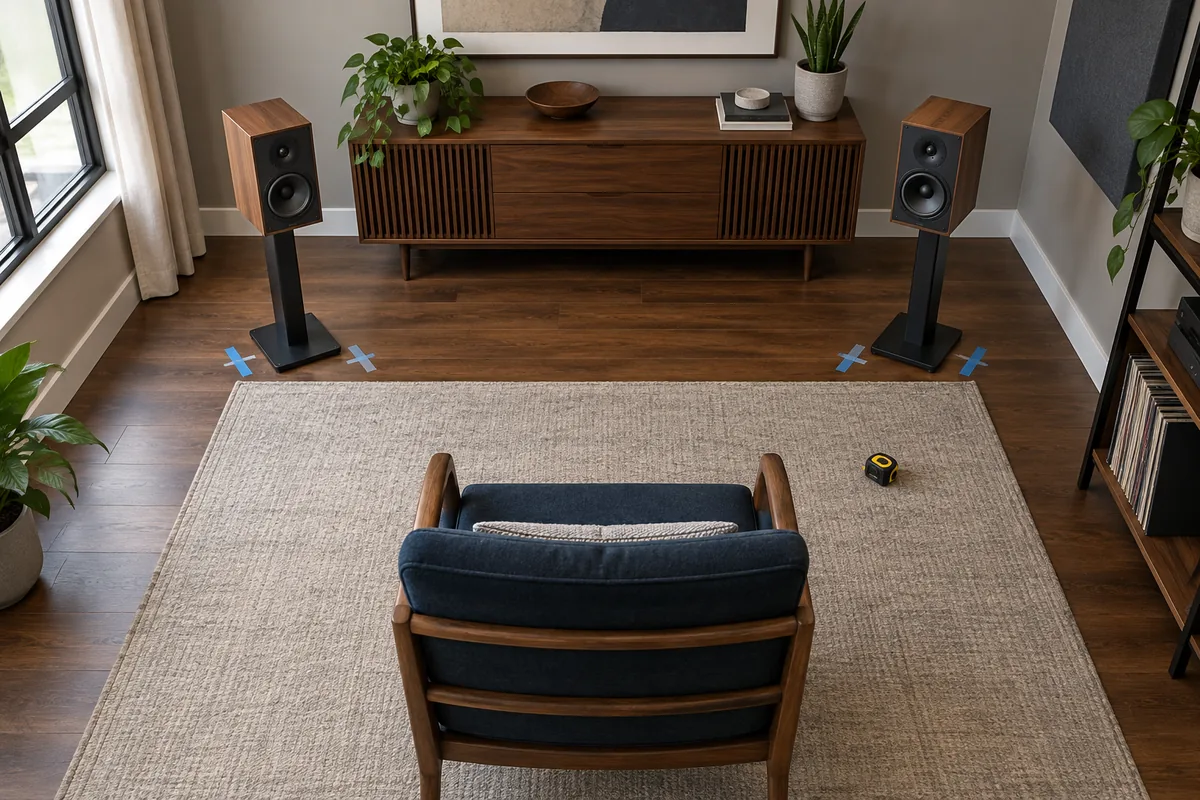
Adjust toe-in in matched increments and judge center focus, stage width, and tonal balance together.
Distance from the front and side walls
The wall behind the speakers—often called the front wall—affects bass in two different ways. Nearby boundaries increase low-frequency output, while reflected sound can return out of phase and create speaker-boundary interference response, or SBIR. A deep SBIR null is difficult to fix with boost because the direct and reflected energy still cancel.
Moving a speaker changes the path length and cancellation frequency, so “keep every speaker two feet from the wall” is poor universal advice. Genelec explains that close placement can move the first cancellation higher, while moving far into the room can push it below the speaker’s useful bass range. The right approach depends on the speaker, crossover, wall, and space. Rear-ported models still need the maker’s specified clearance.
Side walls mainly influence left/right symmetry, early reflections, and some boundary response. Keep the speakers equally spaced from their nearest side boundaries when possible. Avoid putting one speaker in a corner while the other opens into a large space. If the room is narrow, a smaller listening triangle may be better than forcing wide spacing that creates strong, unequal reflections.
Listening position and room modes
The seat is part of speaker placement. Low-frequency pressure varies throughout a room, so a bass peak or null at the chair may be caused by the listening position rather than the loudspeaker alone. Avoid placing the main seat exactly against the rear wall or automatically at the geometric center of a rectangular room; both can coincide with strong modal behavior. Instead, move the seat forward or backward in small increments and recheck the bass.
A room mode calculator can identify predicted modal frequencies in a rectangular room, but it cannot tell you the final response at a specific seat. Doors, openings, construction, furnishings, speaker response, and damping alter the result. Use predicted frequencies as investigation targets, then verify them with measurements.
If the main speakers cannot produce consistent low bass across the listening area, do not keep sacrificing stereo geometry to chase every bass problem. A separately placed subwoofer gives you another positioning variable, and multiple subs can improve seat-to-seat consistency. Our subwoofer placement guide explains that workflow in detail.
First reflections: diagnose before treating
Early reflections from the side walls, floor, ceiling, desk, or large furniture arrive shortly after the direct sound. Depending on delay, level, and spectrum, they can alter tonal balance and image precision. Toe-in, speaker spacing, and listener distance all change their relative strength.
Keep a clear speaker-to-listener path and make the two sides similar. Avoid a reflective desktop between nearfield monitors and your ears, and check whether glass or a bare wall affects only one channel. The mirror method can locate a geometric first-reflection area, but cannot quantify whether it is harmful.
If treatment is justified, a suitably thick broadband absorber can reduce reflected energy; diffusion redistributes energy and needs sufficient distance and an appropriate frequency range. The choice is explained in our acoustic diffuser vs absorber comparison, while the acoustic treatment panels guide covers panel depth, placement, and verification. Do not use thin foam as a substitute for low-frequency treatment.
A repeatable speaker placement workflow
- Measure the usable room. Record length, width, height, doors, openings, large furniture, and the positions the speakers and seat can realistically occupy.
- Read the speaker manual. Note the acoustic axis, recommended listening distance, toe-in guidance, stand height, boundary controls, and port-clearance requirements.
- Choose a symmetrical starting layout. Center the system left-to-right where practical and begin near a 60-degree stereo angle. Match speaker-to-seat distance and height.
- Set the listening position. Avoid the rear wall and obvious room-center positions, then test small forward/backward changes for smoother bass.
- Adjust front-wall distance. Move both speakers by the same amount. Listen for bass changes and measure if possible; do not alter toe-in at the same time.
- Adjust spacing and toe-in. Use mono material for center focus and well-recorded stereo tracks for width and depth. Change one variable at a time and mark promising positions with tape.
- Verify each channel separately. Measure left, right, and both together at the main seat. Large left/right differences often reveal asymmetry, reflections, or unequal distances.
- Add treatment, subs, or correction last. Fix physical geometry first. Room correction is useful for refinement, but it should not be asked to overcome a deep cancellation or a poor listening position.
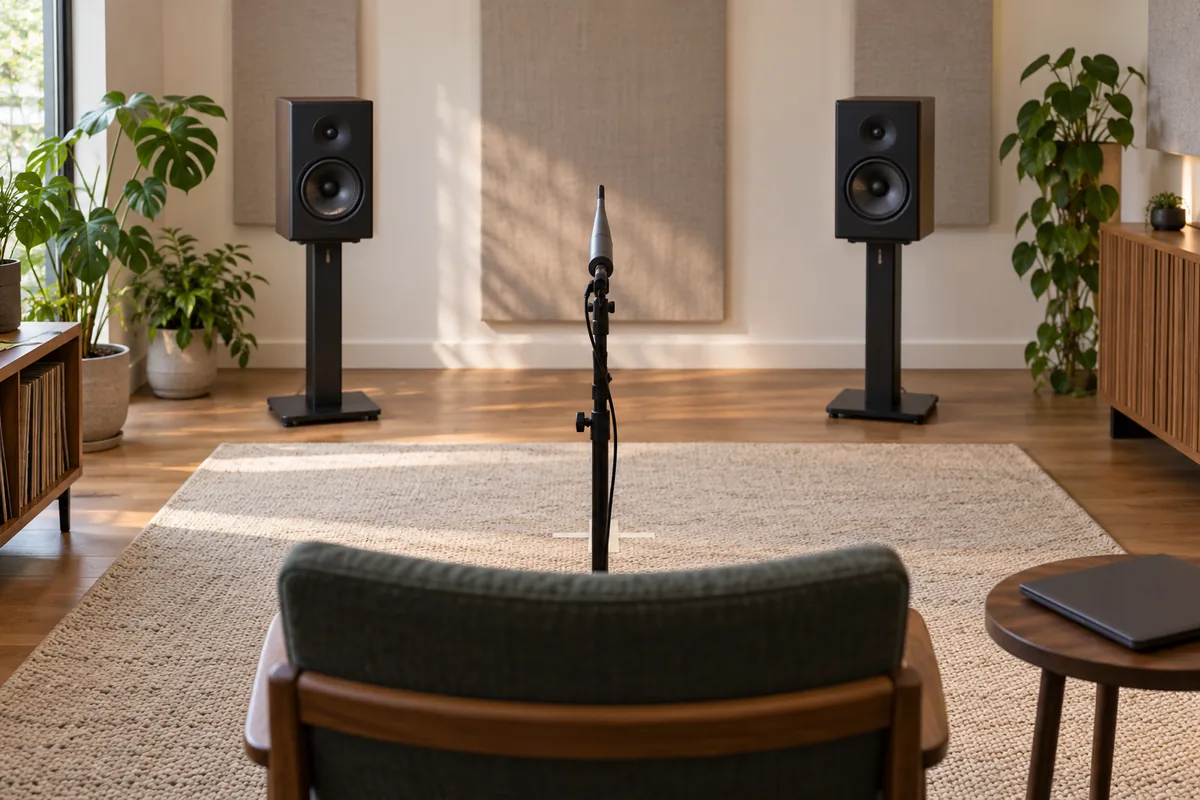
Measure after each meaningful position change so improvements in one band do not hide new problems elsewhere.
Symptom-to-adjustment troubleshooting table
| Symptom | Likely placement cause | Adjustment to test | What to verify |
|---|---|---|---|
| Weak or wandering center image | Unequal distances, height, toe-in, level, or reflections | Re-measure both channels; match toe-in and height; reduce obvious asymmetry | Mono vocal stays centered across several tracks |
| Bass sounds boomy | Seat or speaker near a pressure maximum; excessive boundary loading | Move the seat or both speakers in small steps away from the problem position | Peak reduces without creating a broad new dip |
| Bass disappears at the main seat | Modal or SBIR cancellation | Move the seat first, then test different front-wall distances; consider sub integration | Null changes with position; decay and nearby-seat response also improve |
| Soundstage is too narrow | Speakers too close together or excessive toe-in | Increase spacing slightly or reduce toe-in equally | Center remains solid and side images extend beyond the cabinets when the recording supports it |
| Hole in the middle | Speakers too wide, listener too close, or insufficient toe-in | Narrow spacing, move the seat back, or add modest toe-in | Phantom center regains weight without collapsing stage width |
| Treble is harsh on one side | Unequal toe-in or strong asymmetric reflection | Match angles; address the reflective side; test a small seat shift | Left/right response and perceived brightness become more similar |
| Image is precise only in a tiny spot | Highly directional setup or aggressive toe-in | Reduce toe-in or cross axes differently, within maker guidance | Wider usable area without losing central focus |
How the advice changes by system type
Bookshelf speakers: Use stable stands, correct acoustic-axis height, and maker-specified clearance. Small cabinets still interact with boundaries.
Floorstanding speakers: Confirm the distance needed for driver integration. Small forward/backward moves can still change bass significantly.
Studio or desktop monitors: Keep geometry exact, minimize desk reflections, stay within the recommended nearfield range, and measure each monitor separately before EQ.
Home-theater front L/R speakers: Use the screen centerline and main seat as references. Dolby’s 22–30-degree range is a starting window; screen width, multiple seats, center-channel integration, and dispersion determine the compromise. Apply processor distance and level settings after physical placement.
Verify the result instead of chasing a formula
Use controlled listening and measurements together. A microphone and software such as Room EQ Wizard can show frequency response, impulse behavior, and decay, but graphs still need interpretation. Keep microphone position and level constant and compare one variable at a time.
The best placement is not necessarily the one with the flattest single trace. It should also preserve stable imaging, sensible tonal balance, acceptable decay, and consistency over the seats that matter. Once those physical fundamentals are right, treatment and correction become smaller, more predictable tools instead of rescue attempts.